I feel like I’m writing a lot about planning – maybe not very interesting, but probably under-represented in a lot of the home renovation content out there! And super important! Building is coming soon.
The first major project on our list is new windows. We planned to start with this project for a few reasons, mainly that it would go a long way towards making our home more comfortable and reducing our energy consumption, and it was a relatively simple introduction to DIY permitting and building. (That is, compared to some of the bigger projects we want to tackle!)
We wanted to change the size and location of some of the windows, and so it wouldn’t be a straightforward window replacement – we had to apply for a permit and re-frame several walls. Reid dusted off his AutoCAD skills and drafted scale plans for each of the areas where we’d be changing the window configurations. No permit needed for the windows where the rough opening would not be changing.
This project phase includes the following:
- New windows at the kitchen and bedrooms with no changes to rough openings.
- Front upper floor: shift living room window over by 32″ so that it lines up with the centre of the wall (and new window) at the floor below.
- Front lower floor: replace high strip windows with a large window centred on the wall to match the window above.
- Back upper floor: make the sliding door bigger (14″ wider and 6″ higher).
- Back lower floor: replace the floor to ceiling windows with a sliding door and 3 windows to match the wall above.

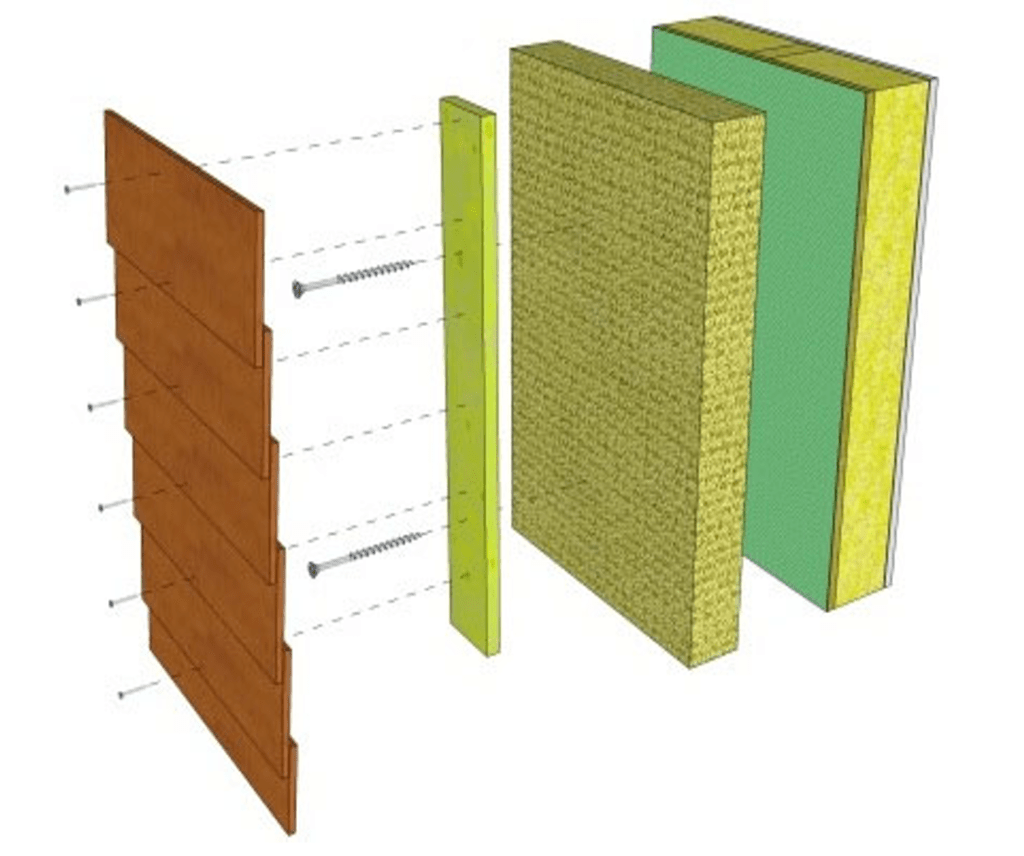
We’re leaving out walls/windows that we plan to change as part of future phases, mainly the front entrance, carport, back lower floor at the stairwell, bathrooms, and lower spare room. For walls that we re-frame as part of this project, we’ll replace the interior plaster with new drywall and insulation (plaster has to be removed to get the existing windows out), and the exterior will get new sheathing (to improve seismic resistance) plus an air barrier and exterior insulation.
This project was my first experience navigating city permitting myself; we had permits for the heat pump and EV charger but our contractors dealt with those. I was nervous having heard stories from neighbours about lengthy processes, but it went well. We had to improve our drawings based on a few of their requests, but fortunately there was nothing Reid’s AutoCAD skills couldn’t handle and in a matter of weeks we had our permit.
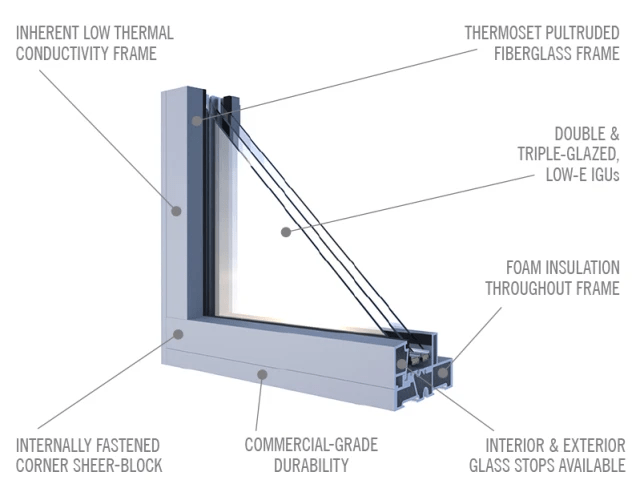
In terms of the windows themselves, we went with Cascadia Windows Universal Series with triple glazing. These are great windows for a few reasons:
- Fibreglass frames (with triple glazing) are very well insulated and energy efficient, meeting our criteria for Passive House certification plus improving thermal comfort in the winter.
- Fibreglass is better than vinyl for embodied carbon, health, and wildfire resistance.
- They’re local, made-in-British Columbia windows.
We spent a lot of time measuring and double-, triple-, and quadruple-checking all of our rough opening sizes, plus deciding on the specific configurations, operator types, hardware, and various other choices. We went with tilt and turn for the operable windows, I love that these give the option of a small opening for a bit of ventilation or being able to fully open the windows to get lots of air flow.
With our window order nailed down, we were ready to start building – and with a deadline to get the rough openings ready by the time the windows arrive!
